Tuesday, June 12, 2007

Draw Eric Cartman

Eric Theodore Cartman, is a fictional character in the animated series South Park. He is one of the four central characters. Cartman is arguably the most well-known and recognizable characters of South Park.

Cartman wears a light blue and yellow beanie, a red jacket, and brown pants most of the time. He wears a green or white T-Shirt under his jacket, though it is rarely seen. He has light brown hair (although it is occasionally black, such as when he is presented as Adolf Hitler or a sumo wrestler); and of the four leads is the one who is most frequently seen without his cap. He has a double chin, large hands and feet, and is often made fun of due to his obvious weight problem, a fact that Cartman himself is in denial about, claiming that he is "just big boned" when it is shown to obviously be his own fault as a result of his excessive diet of unhealthy food.

OK, lets start drawing Eric Cartman. Create a new document in photoshop with size, Width: 465 and Height: 400 pixels with white background.

Create a new Layer. Get the Elliptical Marquee Tool and create an ellipse. Fill it with this color: d6b58c. Look at the image below:

Create a new Layer. Draw the hat with this color: 39adc6. You dont need to be very precise, just draw the hat with free hand on his hat and create a Clipping Mask. Look at the picture below:


Create a new Layer. Get the Elliptical Marquee Tool and create the eye's. Look at the picture below:

Get your brush and draw pupils for the eye's on the same Layer.

Create a new Layer get the brush and draw the yellow line on Eric Cartman's hat with this color: efd610. Look et the picture below of Eric Cartman:

On the same Layer with the same color draw the top of Eric Cartman hat.

On a new Layer with the brus and black color draw the mouth. On a new Layer draw a chin on Eric Cartman face with this color: b59d7f. Look at the picture of Eric Cartman below:

On a new Layer draw the eyebrow's and thats it you can put some red color on the face and here is mine final image of Eric Cartman:

Here is another drawing of a South Park character , Kyle:

Saturday, June 9, 2007

Create your own Product Box

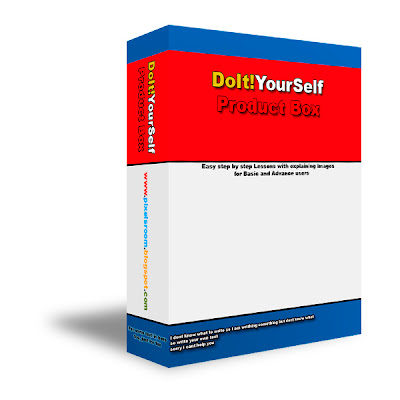
Before we begin let me say that this is really easy tutorial. You just have to know to work with the Free transform option (move tool) which is a piece of cake. Do you want to design an attractive box for your product? With Photoshop, you can easily create one, just like this:


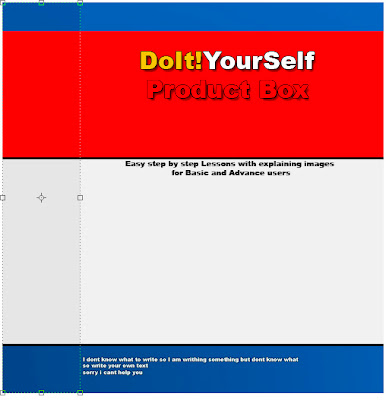
OK, lets begin. Start Photoshop and create a new document with these settings "Width:" enter 600, for "Height:" enter 600, "Resolution:" enter 72, and "Background Contents:" enter White. Click "OK."

Create a new Layer and call it shadow. Take the Rectangular Marquee tool and make a selection. This selection is going to be the front of the box. Fill it with black color. Turn the visibility off. Just click the eye next to the Layer. Don't deselect.

Create a new layer, and fill it with a color of your choice. This color will be your background color on your product box. Now every color you want to put on your box first create a new Layer then fill it with the color. Look at the picture below for better understanding:


Also type your text on it as you can see on the preview above.

Now Merge all the Layer with the box colors without the text and the white background. Take again the Rectangular Marquee tool and make a selection in the middle of the box. Press Ctrl+J, this is going to make a duplicate of the selected part. This is your side of the box. On the side of the box (the layer you duplicated) reduce the Brightness a little (-20). This is done so you can see a shadow on the side. Now put this Layer on the left side of the front of the box, see image below:


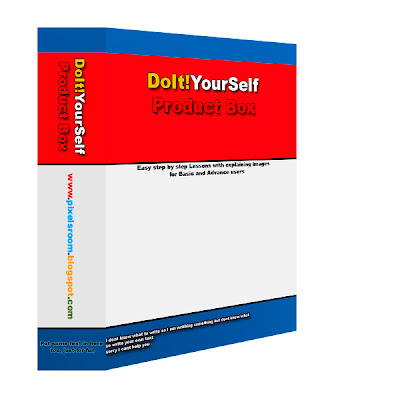
OK here comes the tricky part. Merge the text you put on the front of the box with the front box. After that get the Move Tool go Edit>Free Transform and select distort. Now put you mouse cursor over the top right handle and move it a little bit down. Do the same with the bottom right handle. Look at the picture below:


Now do the same with the side part of the box.

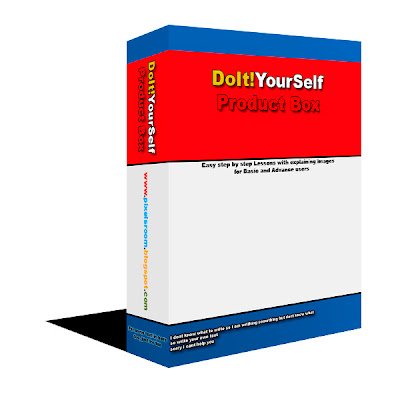
When you are done put the visibility of the shadow Layer on. Distort it like on the picture below:


Now add a Gaussian Blur to this Layer, Radius 10 pixels and lower the Opacity to 50%.

And thats it. You have your Product Box here is my final image:


Thursday, June 7, 2007

Creating cool dynamic photography

Photography is the process of recording pictures by means of capturing light on a light-sensitive medium, such as a film or sensor. Light patterns reflected or emitted from objects expose a sensitive chemical or electronic medium during a timed exposure usually through a photographic lens in a device known as a camera that also stores the resulting information chemically or electronically.

The word comes from the Greek words φως phos ("light"), and γραφίς graphis ("stylus", "paintbrush") or γραφή graphê ("representation by means of lines" or "drawing"), together meaning "drawing with light." Traditionally, the product of photography has been called a photograph commonly shortened to photo.


Here is another very easy but cool tutorial to do. All you need is a picture of whatever comes to your mind. I am not going to get in to introduction becouse there is nothing to introduce.

Lets start. Open your picture in photoshop. Here is mine:


Make a duplicate of the background Layer. To make a duplicate of the layer, click the Layer and hold your mouse button and drug the Layer to the bottom of the Layers Palette and release it on the create new Layer icon.

Desaturate the duplicated Layer. You can go Image>Adjustments>Desaturate.....or you can press Shift+Ctrl+U.

Add a Layer mask to your desaturated Layer. Now take your brush, choose a black color and brush your object in the picture, the one you want to keep your focus on. In my case a brushed the glasses. Here is what I got:


And thats it. You can edit the picture a little further like I did, but thats pretty much it.

Tuesday, June 5, 2007

Match Color Option in Photoshop

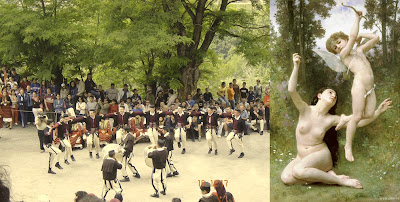
Here is a tutorial that can save you a lot of time. And not just time it can produce a really cool effect. Ever wanted to create a sort of dynamic image but ended up with nothing at all. Well here is the answer. Don't worry, you don't need to be an expert photoshoper to do this. It's very simple and it only takes a few minutes of your time.

Lets begin. Open your picture in photoshop, the one you want to add the color. Take any kind of picture. Here is mine:


Now open the second picture, the one that has the color you want to add to your original picture. Here is mine picture:


This next step is where the magic happens. Go Image>Adjustments>Color Range.......This window will show:


OK, in the window in the "image statistics" part, there is the source option. Click on the arrow that points to down. There you will see every picture you have opened in photoshop. Choose the second picture you opened, the one with the color you need.

This is what I got by merging my two images:


You have to admit there is a big difference. With the window still open you can try to experiment with the sliders where it says "Image Options".
After you're done click OK.

If you are not satisfied with your result you can do this. Go Edit>Fade Match Color, this is only possible after you close your Match Color window. And it can be done with every other option in Photoshop. From the box that will pop out you can lower the Opacity if you want or change the Blend Mode, and that's it you're done. Here is some more examples:


This effect is very good for creating that effect of old picture, or sepia effect.......

Monday, June 4, 2007

Create your own Pattern

The pattern is a form template, or model (or, more abstractly, a set of rules) which can be used to make or to generate things or parts of a thing, especially if the things that are created have enough in common for the underlying pattern to be inferred, in which case the things are said to exhibit the pattern. The simplest patterns are based on repetition/periodicity several copies of a single template are combined without modification.

This is a really easy tutorial that needs a basic knowledge of Photoshop. If you want to learn how to create custom Patterns this is the place to be.

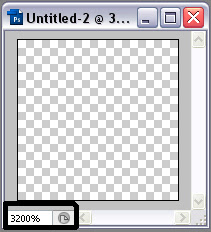
OK, let's begin. Create a new document with size 5x5 pixels. You can try from 1x1 pixels to 10x10 pixels large document, but for now use a smaller size document. Make sure is transparent.

The document will be very, very small, so zoom in to maximum.


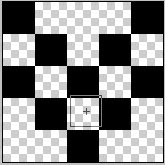
Now take you Pencil Tool, size 1 and make sure you color's in the color's palette are set to default, black and white.

With the Pencil Tool create a simple shape on the canvas. Don't draw with it just click and lat go, again and again until you get your shape. Look at the picture below:


When you're done go Edit>Define Pattern a window will pop out, give you're Pattern a name and click OK. That's it. Close you're document you don't need to save it.

Create a new Document now, a larger one, let's say 450x450 pixels, go Select>Select All, this will select the whole canvas,m than go Edit>Fill, from the box that will pop out choose Pattern click the black arrow on the top right corner find your new Pattern, it should be last in the menu, select it click OK and there you have it.

Creating a custom brush has the same process.

Sunday, May 27, 2007

Pop Art (drawing basics)

Drawing is a visual art which makes use of any number of drawing instruments to mark a two-dimensional medium. Common instruments include graphite pencils, pen and ink, inked brushes, wax color pencils, crayons, charcoals, pastels, markers, stylus or various metals like silverpoint. An artist who excels in drawing is referred to as a draftsman or draughtsman.

Drawing is a form of visual expression and is one of the major forms within the visual arts.

OK, I am going to explain here the basics of pop art. Before we begin it is essential to know how to use Photoshop's Pen Tool. I dont have a tutorial for that, yet, but I will post it.

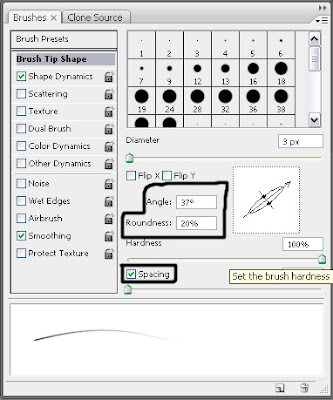
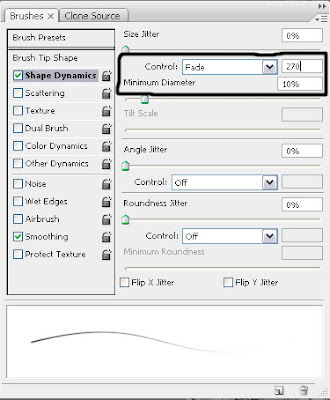
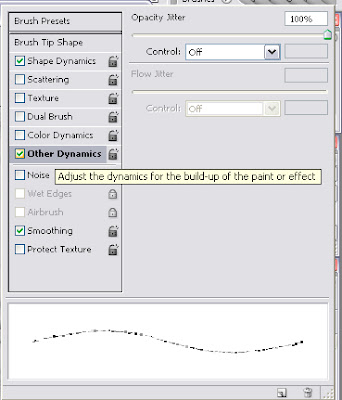
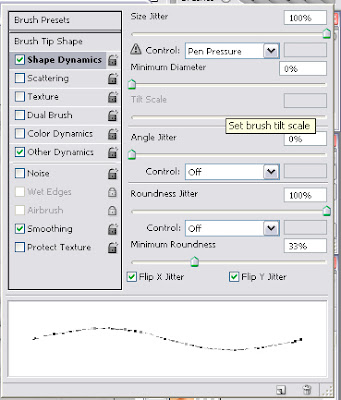
Open Your photo in Photoshop. Create two Layer's. The one above the photo, call it white, the one above the white Layer cal it outline. (To rename a Layer just double click on the Layer name and write) Turn the visibility off, on the white Layer. Take the brush open the brush palette and enter this settings:


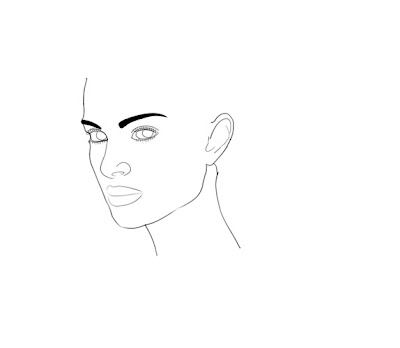
Now on the Outline Layer, take the Pent tool and trace the outline of the person on the photo. This is not that hard, add a point with the Pen Tool, select the add anchor point tool and add a anchor and edit it. If you want to see your progress click the visibility of the white Layer on. After a long work you should have something like the picture below:


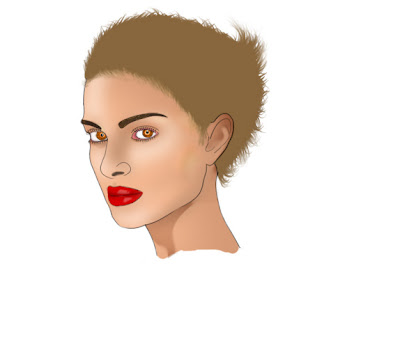
Now on a new Layer color the skin. When you color the skin look at the original photo to see the source of the light. Just select the colors of the original image and brush them on the new Layer. Or if you like you can use Burn and Dodge Tool to do the same. You should have something close to this:


It's a good idea to use separate Layer for all parts of the face (Lips, eye's, ear's...)

Now for the hair this is what will do. Create a new Layer. Trace the outline of the hair and color it with the color of your choice. This is going to be your final color look. Take the smudge tool, strength 85% and brush size 1-15 soft brush. You have to use different size brushes. First smudge the edges. Look at the picture below:


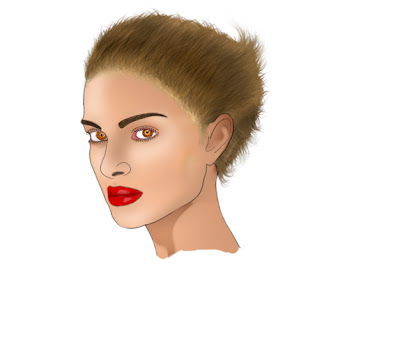
Now take the Dodge tool, exposure:15% brush size 3-10, Mode: Midtones, brush away with this mode, than when you are finished change the mode to Highlights and do the same. After this Take the Burn Tool and repeat the same process. After some time you should have something like the picture below:

And here is the final result:


Wednesday, May 23, 2007

Realistic Photo Print, (curl edges)

OK, ever wonder or wanted to create curl edges on your photo, but you end up with nothing at all, well here is an easy step by step tutorial to help you with your problem.
First create new canvas, a bit bigger then the photo you are going to use in this tutorial. Fill it with white.

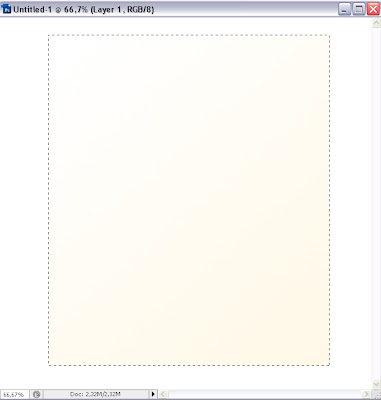
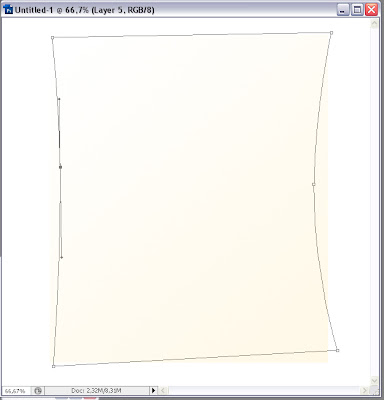
Create a new Layer, take the Rectangular Marquee Tool And create a selection with it, and take the Gradient tool. Make the colors white and (fef8e7), and make a diagonal line with the Gradient tool. Look at the picture below:


Don't deselect yet, go Select>Modify>Contract and add a value of 4, or what suits you best. Create new Layer on top of all the others , dont deselect, and fill the selection wit what color you want. Deselect.

Now open the photo and put it on top in the layer palette. Create a clipping mask with the previous layer. Create a new layer and put it on top. Take the Gradient tool and set it black to transparent. Remember the layer we used to create a clipping mask, well click on it to make a selection (not the photo layer, the layer under it). With the gradient tool draw a diagonal line, but very short from the top left corner to the center. Look at the picture below:


Do the same with the down right corner but with white color. Reduce the opacity on both layers to 65%.

With the selection still active create a new layer and put it under the first gradient layer we did. Right click in it and select make work path and enter a value of 10.
This will be the shadow and the main step for this tutorial, because this step will give the final look to the photo.

Ok, take the add anchor point tool and curl the edges of the path like in the picture below:


Now right click in it and select make selection, 0 . Fill this selection with black, lower the opacity to 50%, go filter>blur>Gaussian blur and enter a value of 4 or 5 or 6.
If the curls are not what you expected take the move tool and edit them, but just a bit.

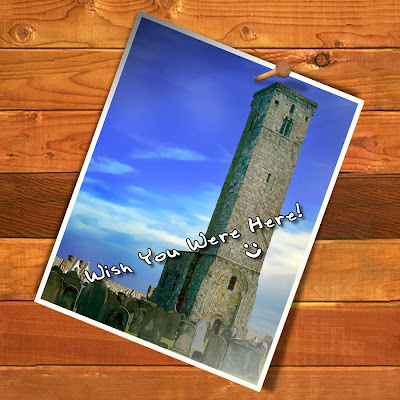
Here is the final version:


Saturday, May 12, 2007

Create a sketch image

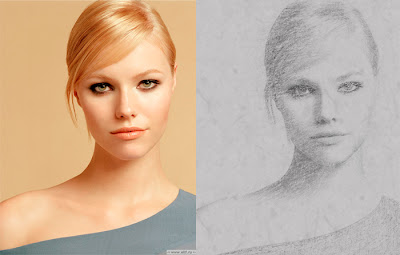
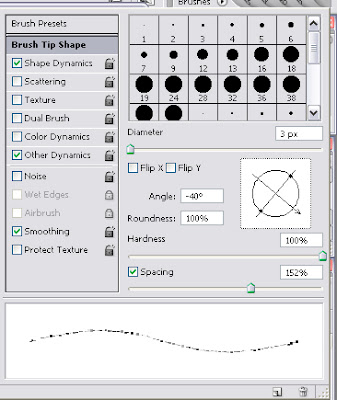
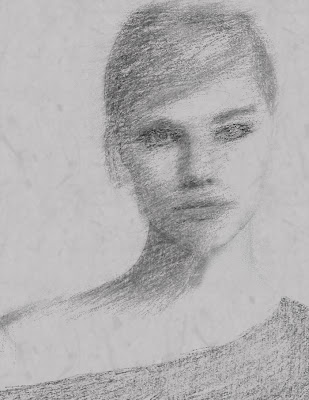
The goal of this tutorial is to show you how to use the brush palette and how to turn ordinary images in to sketch, like in the example below.


Open the image you want to turn in to sketch. Go Layer>New Fill Layer>Solid Color and chose grey color. Click OK.

Now on the bottom of the Palette there is an icon that says New Fill or Adjustment Layer, click on it and chose Pattern. From the window that will pop up click on the black arrow and chose Grayscale Paper, then from the Pattern menu chose Fibers 1, put the Scale value on 340%.Change this Layer Blend Mode in Soft Light.
Make a Duplicate of the Background Layer and put it on the top of the Layer Palette. Go Filter>Stylize>Glowing Edges and use this values: Edge Width 3, Edge Brightness 11, Smoothness 10, click OK. Now pres CTRL+I.

Now we need to make the picture black and white. Go Image>Adjustments>Desaturate. Put this Layer in Blend Mode Multiply and lower the opacity on 15%.

Make another duplicate of the background Layer and again put it on the top of the Layer Palette. Desaturate the picture again (Image>Adjustments>Desaturate)and open the Brightness/Contras option and rise the contras slider by +22.

Now go Filter>Noise>Add Noise...Amount 12%, Gaussian и Monochromatic and Layer > Layer Mask > Hide All.

Get the Pencil Tool and open the Brush pallet.

This is how it should look:


On the Layer Mask with the Pencil Tool brush away, feel free to brush everything on your image, this is what I had in the end:

Subscribe via email

Enter your email address:

Delivered by FeedBurner